

Hi everyone! Today we will create a user authorization page for the Bizon 365 online platform using the Tilda functionality. First of all, why do we need a customized login page?
There are precisely two reasons:
- In the standard version offered on Bizon 365, users often make mistakes when entering their phone numbers. It means you won't be able to get their details for further proposals.
- The authorization page on the service itself doesn't look very attractive. Further, you cannot change anything other than the background.
So if you want to impress your students and participants with a stylish design, let's get to work. We only need accounts on Tilda and Bizon 365, a piece of inspiration, and our manual.
Where to start
First, you should create a webinar room on Bizon, then set up a page on Tilda that will be used to authorize your visitors.
Of course, it will be helpful to decide what you want to request from users? There are only 4 options that Bizon 365 allows to implement. The simplest is authorization by name. If you expand it a little, you can also request a phone number or email. For the most demanding, there is authorization, including name, phone number, and e-mail. If you want to invite to the webinar only those who are ready to provide all the personal data - choose the last option.
But let's move on to practice. Where to choose the type of authorization? Go to the "Access" tab in the settings of your webinar room - there, you can select the options that will be displayed when users are authorized. You can see this in the screenshot (however, you won't miss anyway).
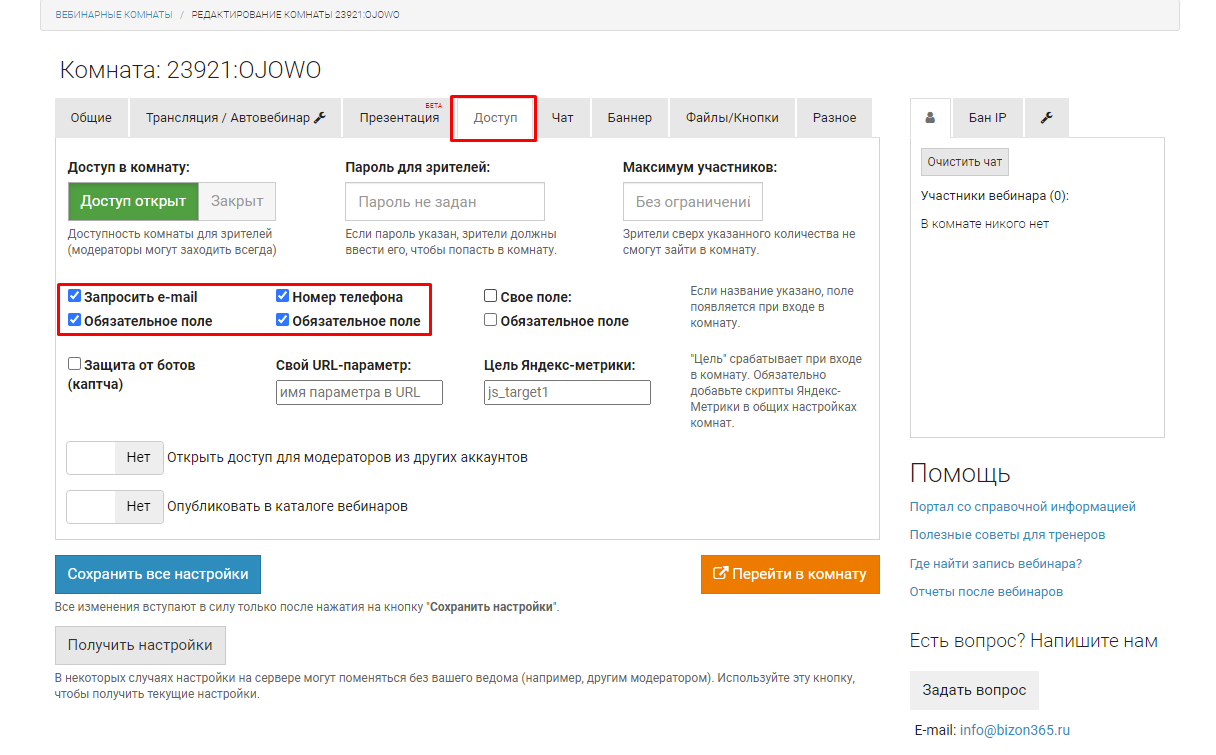
After you select everything you want to get from the visitors, you can view how the login page on Bizon will look like. An example of triple authorization can be seen below:

Looks nice but boring. Let's make this option enjoyable with a personalized design. And to do this, go to your account on Tilda. Here you can create a new page with a more exciting design. Standard templates in the "Form and Buttons" section have different options to choose from: you can add video and authorization fields or image and authorization fields. Choose what works best for you.
But this is just the beginning of the customization process. Go to the Zero-block and change the text on the page (try to be creative and make it enjoyable, your visitors will definitely appreciate it). Don't forget to configure the number of fields that you have chosen for authorization on Bizon 365; otherwise, you will receive an epic fail. Customize each of the fields on Tilda for every parameter, as is shown below.
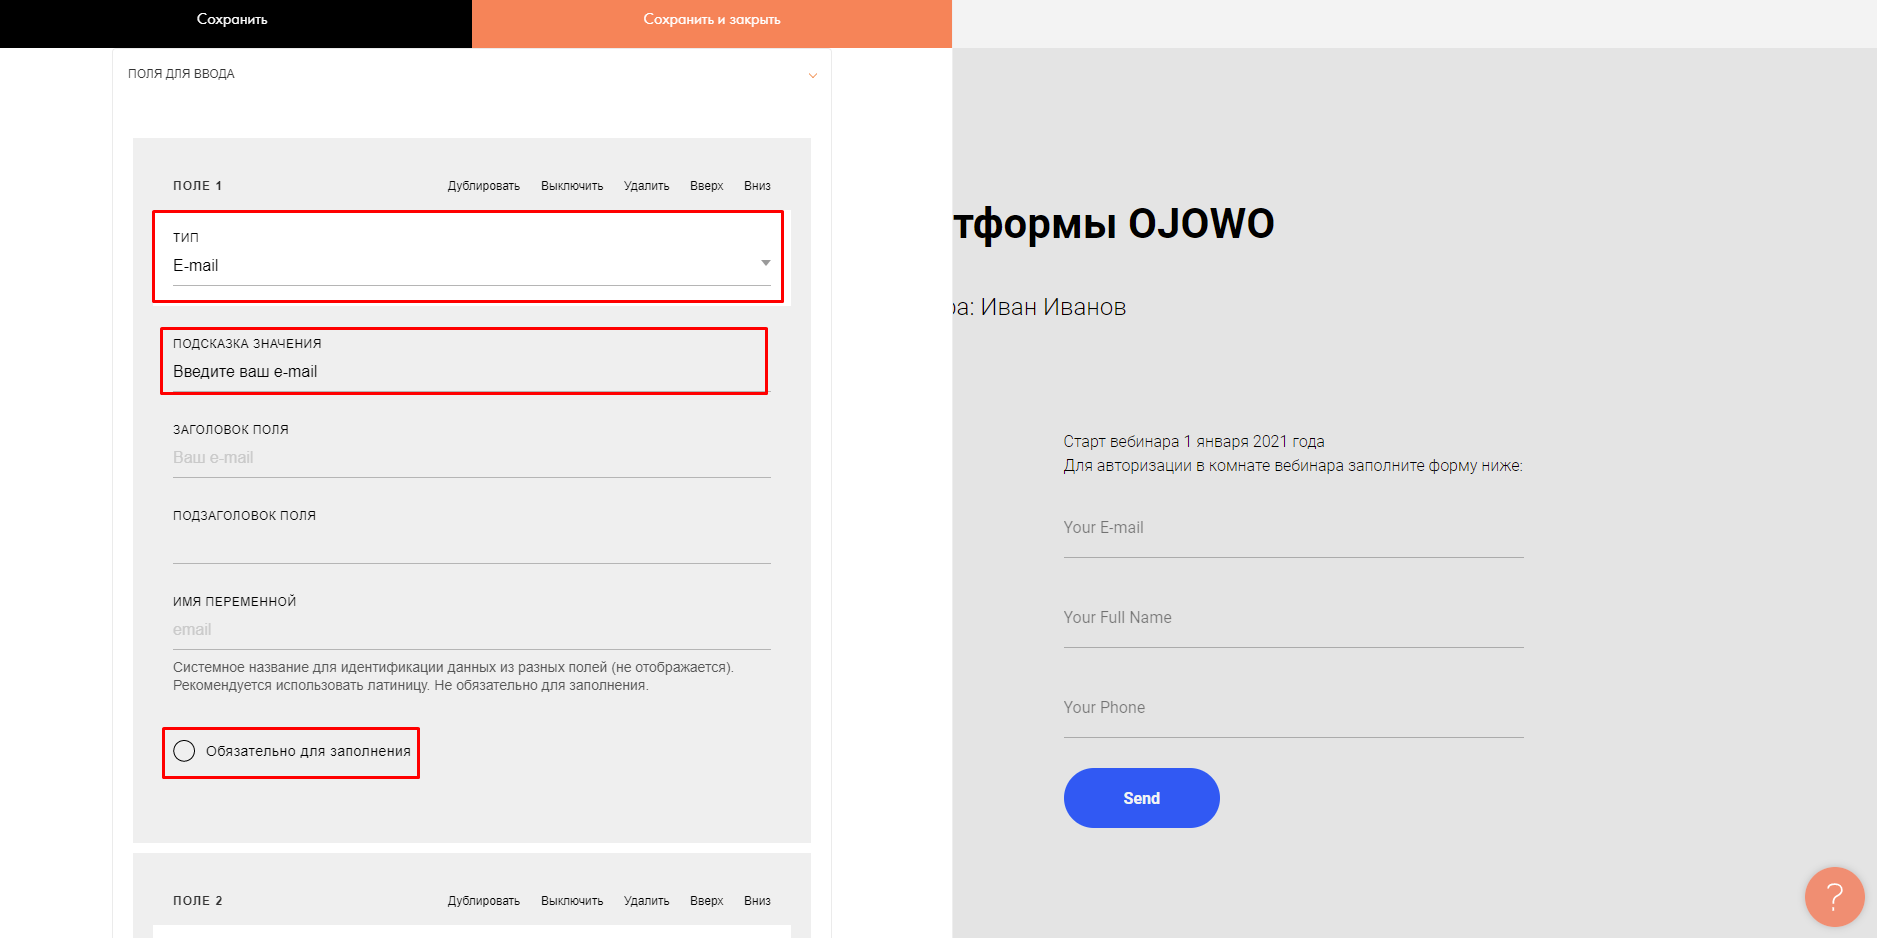 The result should be something like this:

Of course, you can choose the name of the webinar, tips for the login form fields, and videos to your liking.
Then you need to set up a redirect from the Bizon page to the page on Tilda and vice versa so that your listeners will join you. What are the steps?
First, find a link to your login page on Bizon 365. To do this, go to "General" / "Open link for viewers" in the settings of the webinar room. Copy the link under the caption, and go back to Tilda.
But first, find below our ready-made scripts for your authorization option and select the one up to your needs. Remember, a good script is a key to success!
- For triple authorization by name, phone number, and email, follow this link and copy the following script.
- For minimalists who only need a username, the script is right here..
- To request name + phone number — click here..
- And here’s the script for those who want to receive a name and e-mail.
But what to do with this script? Let's follow these steps:
- Go to your Tilda page.
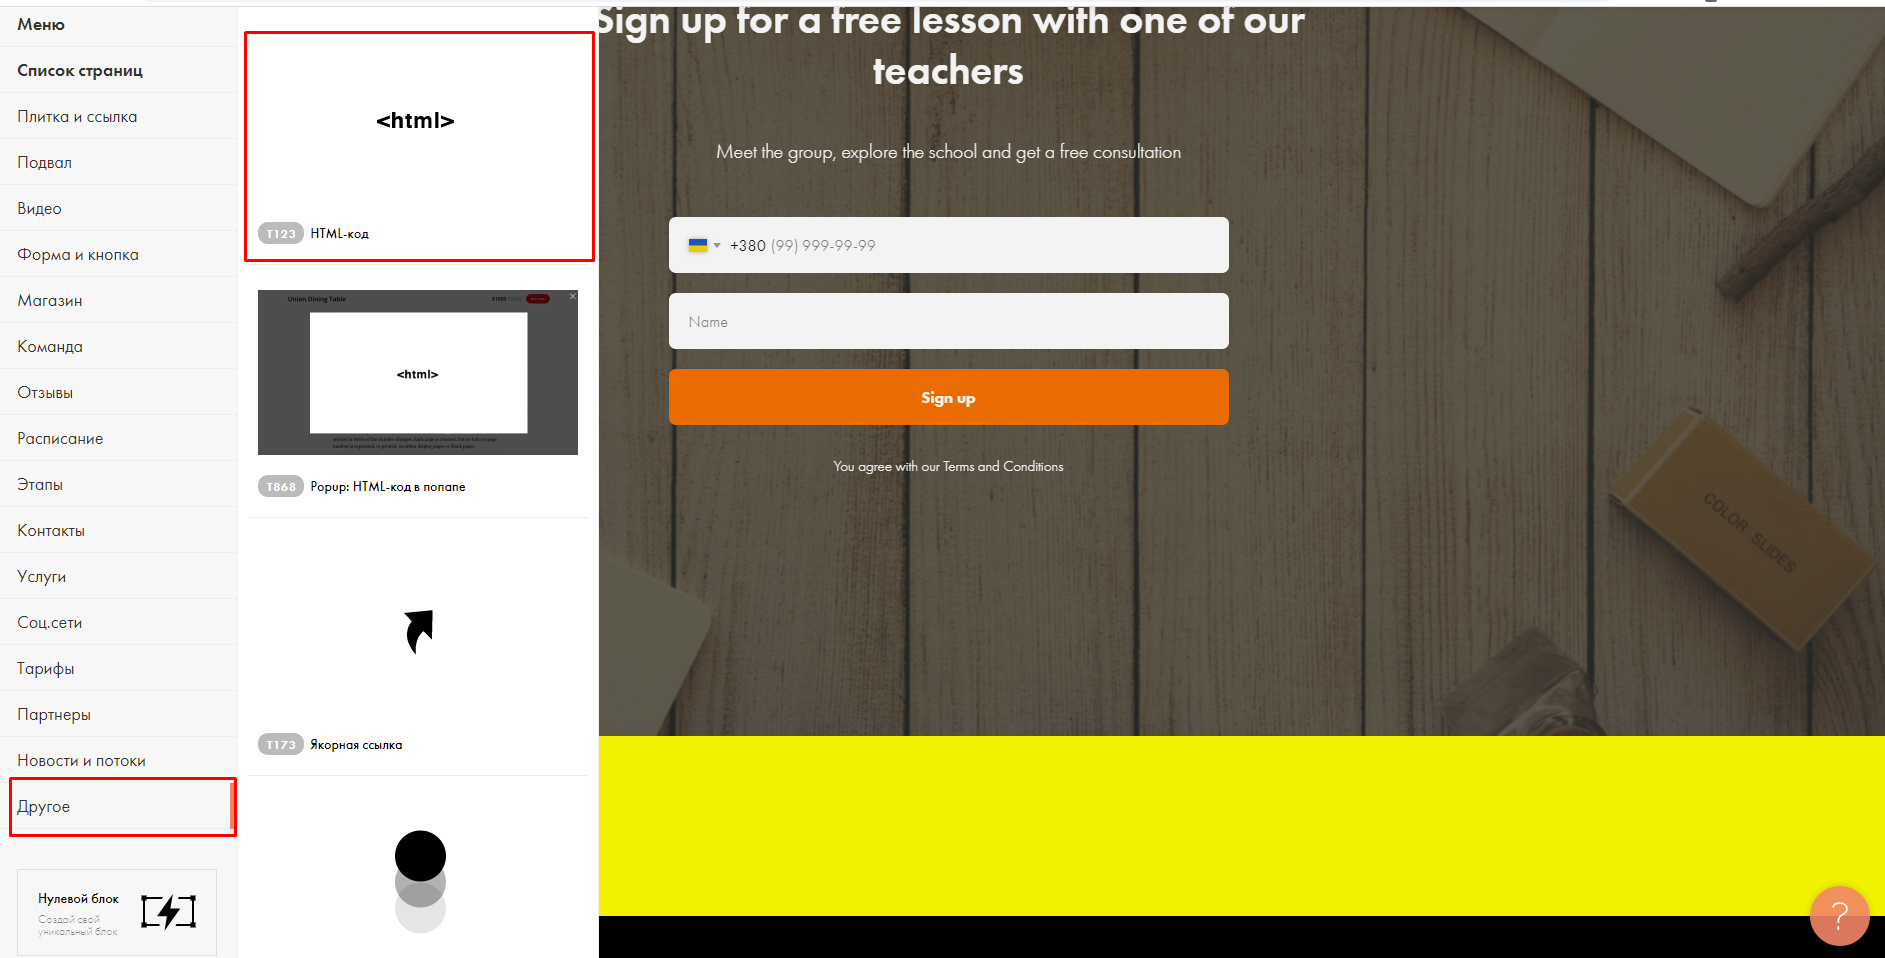
- Go to the Menu / Page List tab and create a new HTML block. See our screenshot to make sure you get it right.
- Insert our script in the "Save and forget" tab.
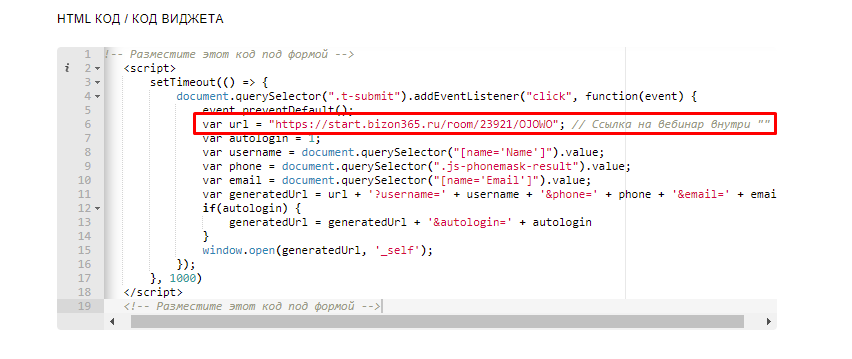
- Change the link in the "var url" script line to your link with the authorization page on Bizon 365. Don't forget about the HTML syntax! The result will look like this:
- Save and close. Then publish the page.
Results
And the most important thing: be sure to check how the authorization page is displayed. You can compare our two examples to see the differences.
Here is our default design created by Bizon -
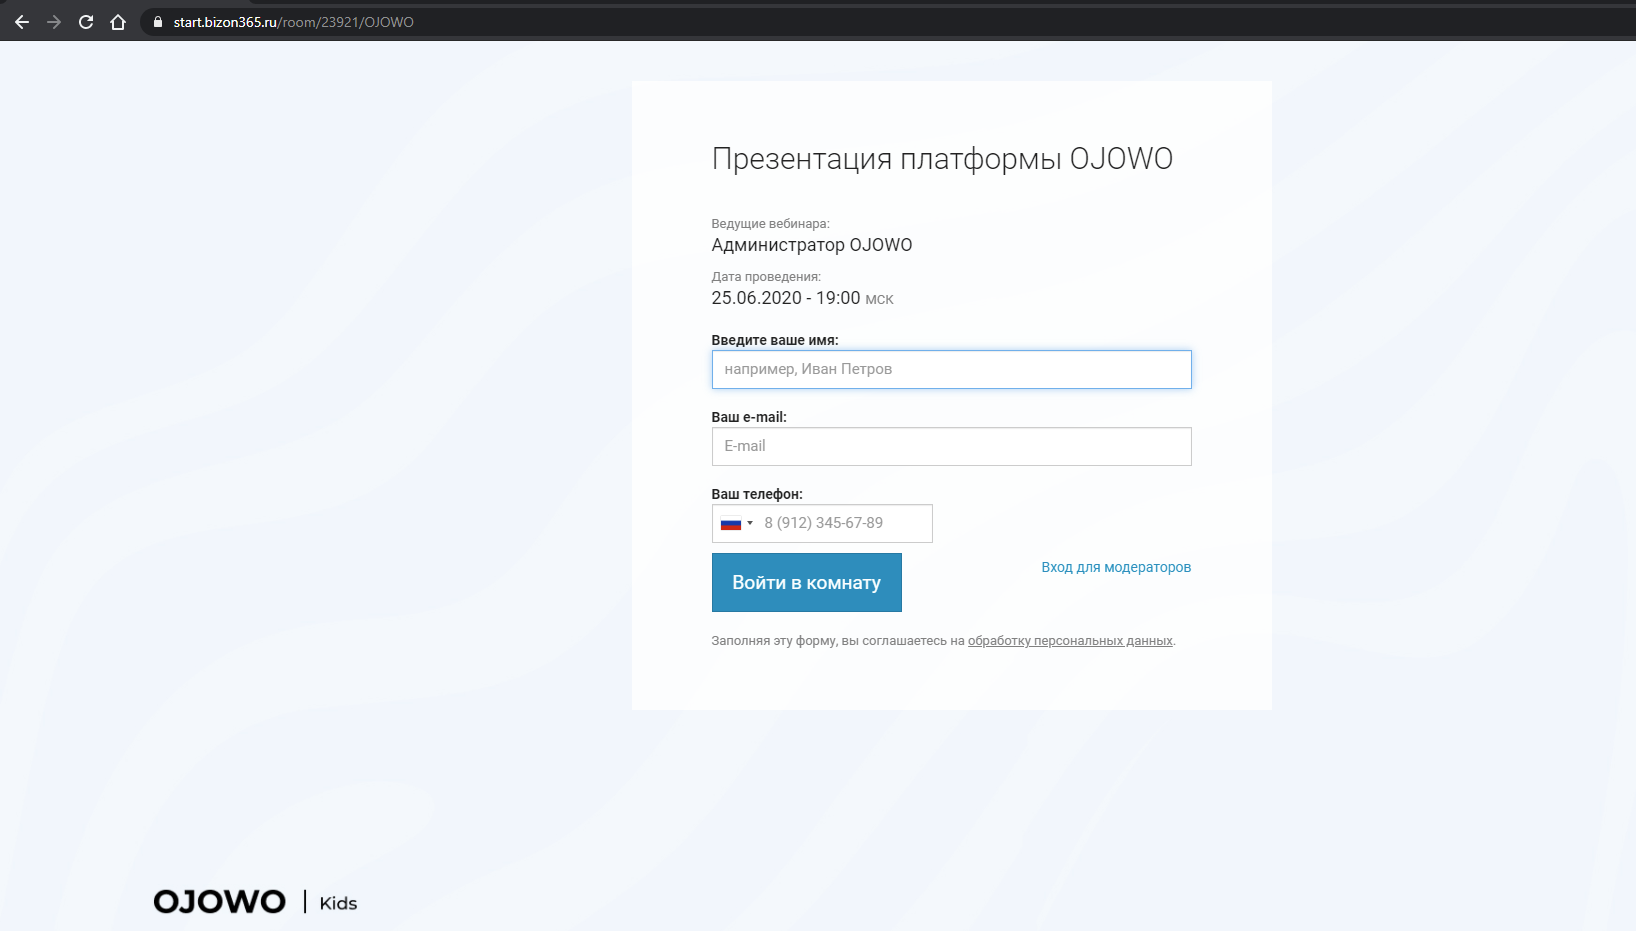
Boring, dull, and generally uninteresting.
But what happened after a bit of involvement -
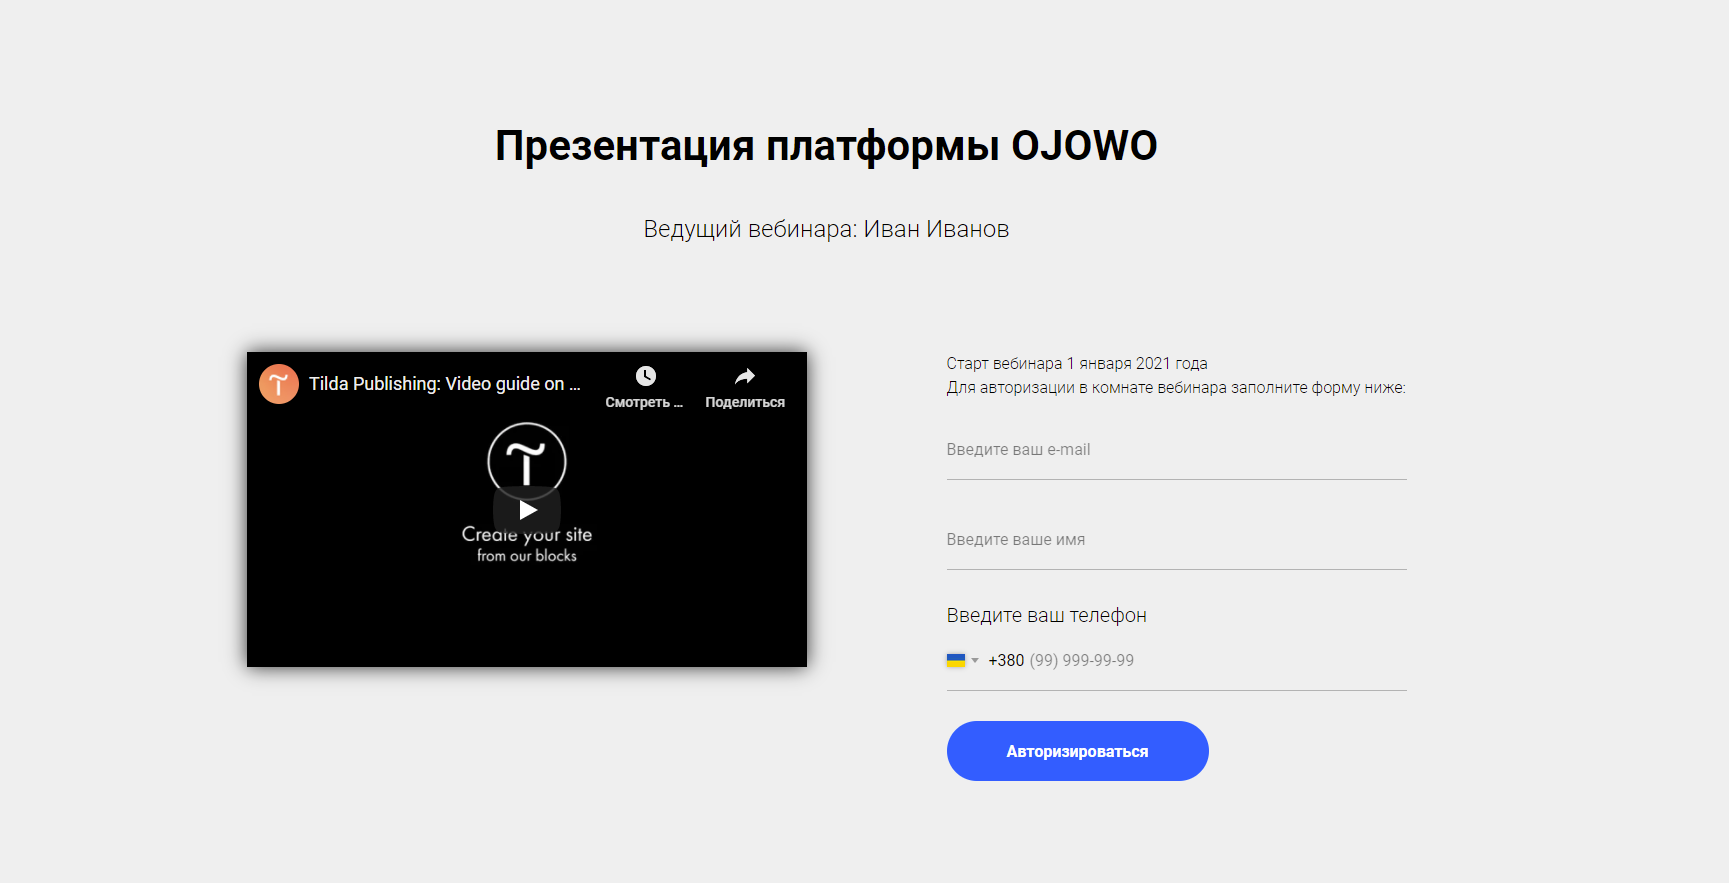
It's cool and trendy. Well, or at least unique.
Congrats, you've reached a new peak in your work! Now you can make each webinar even more attractive through the content and with the help of our life hacks. Remember that the first impression lasts forever, and your login page can get you more listeners if you follow our tips.
Still, have some questions? Please leave them in the comments below. We'll analyze the most interesting and useful ones in the next articles. See you soon, stay safe and stay tuned.